Photo Guide
One of the keys to getting more jobs on Everyset is having standardized pictures. Casting Directors for Background jobs do not need “good” pictures. Rather, they want something that shows what you truly look like.
We ask that you provide 4 pictures:
- Portrait (Chest and up)
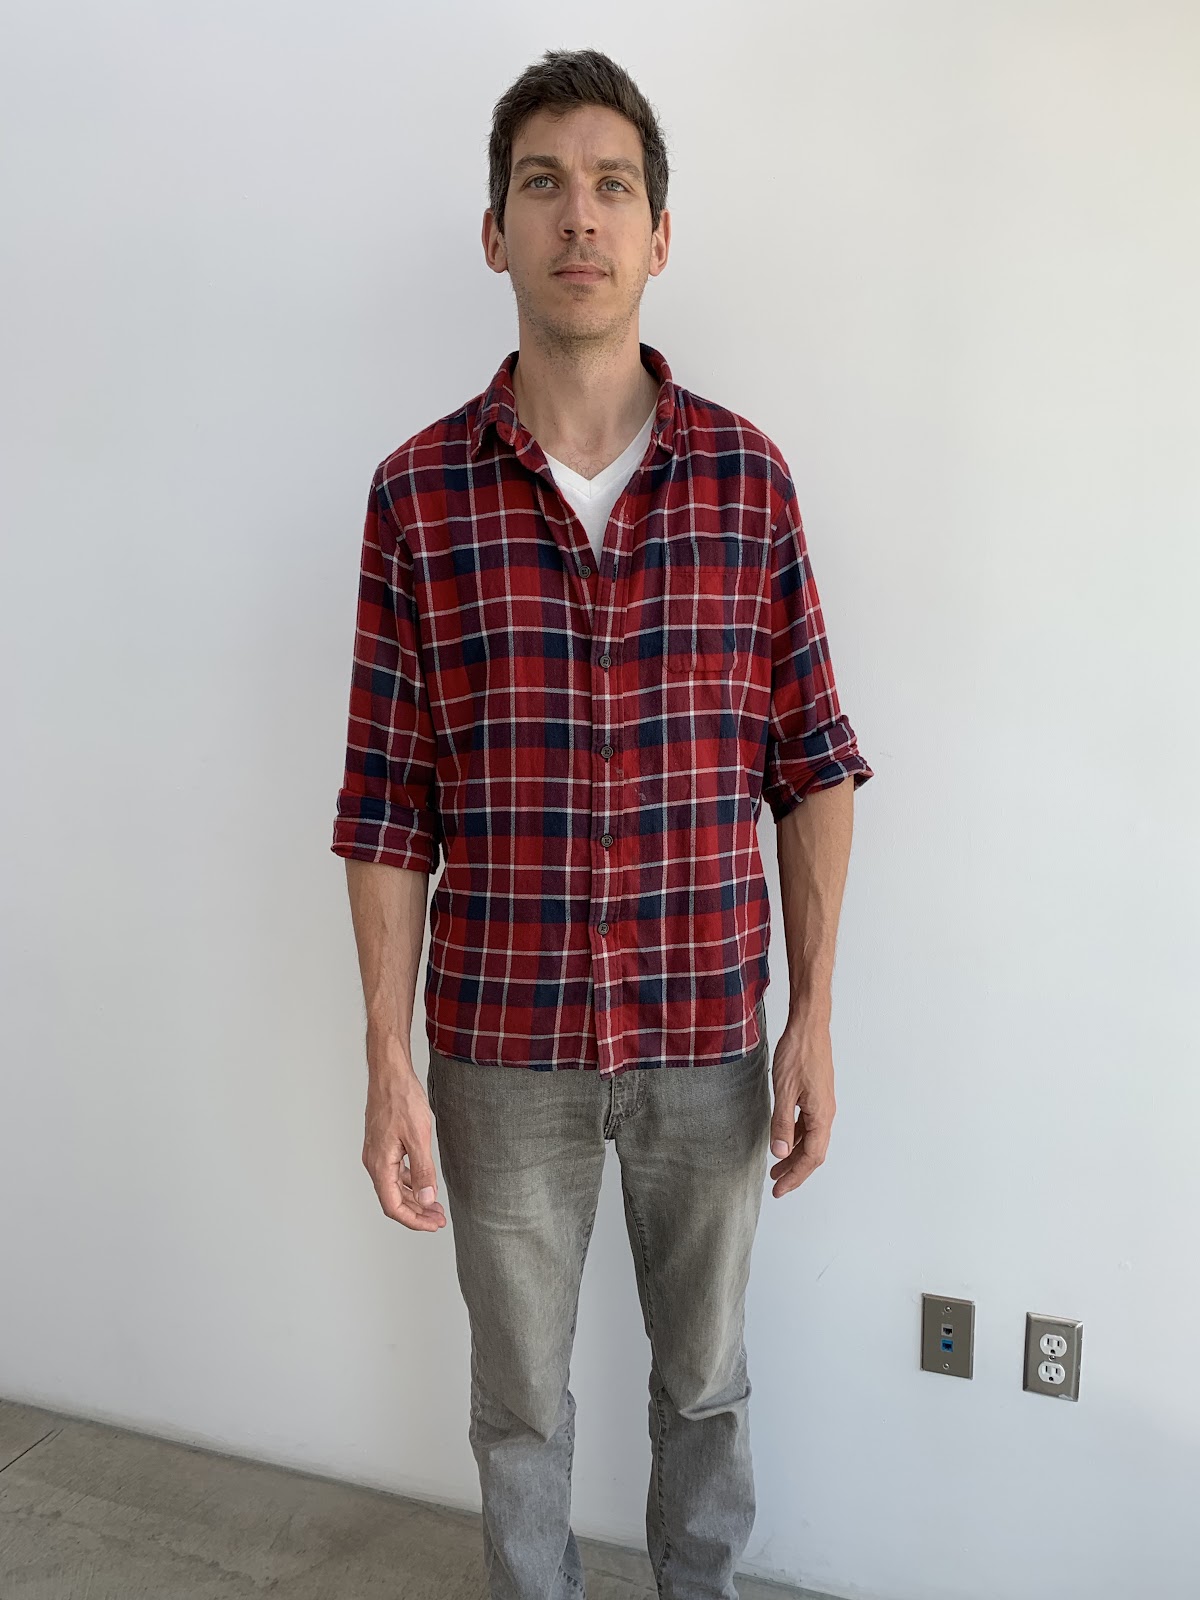
- Full Body - Casual wear
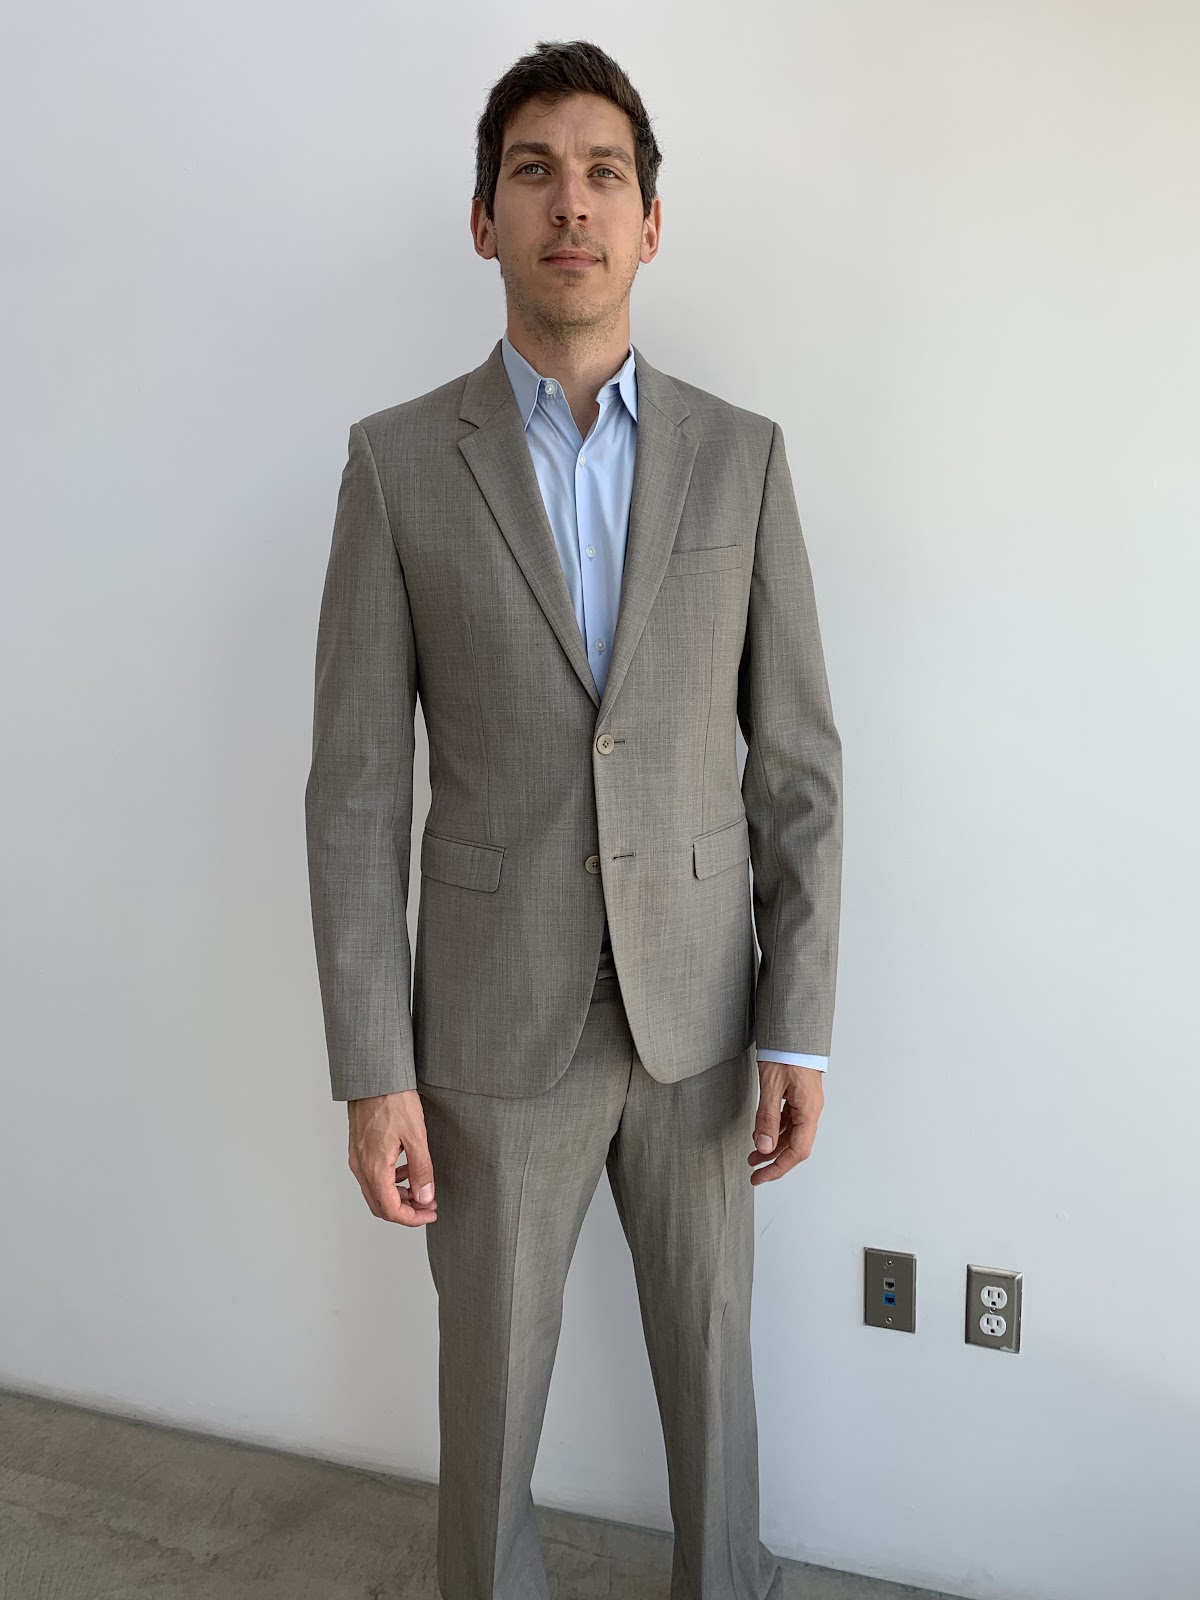
- Full Body - Business attire
- Full Body - Swimwear
How to take the portrait picture
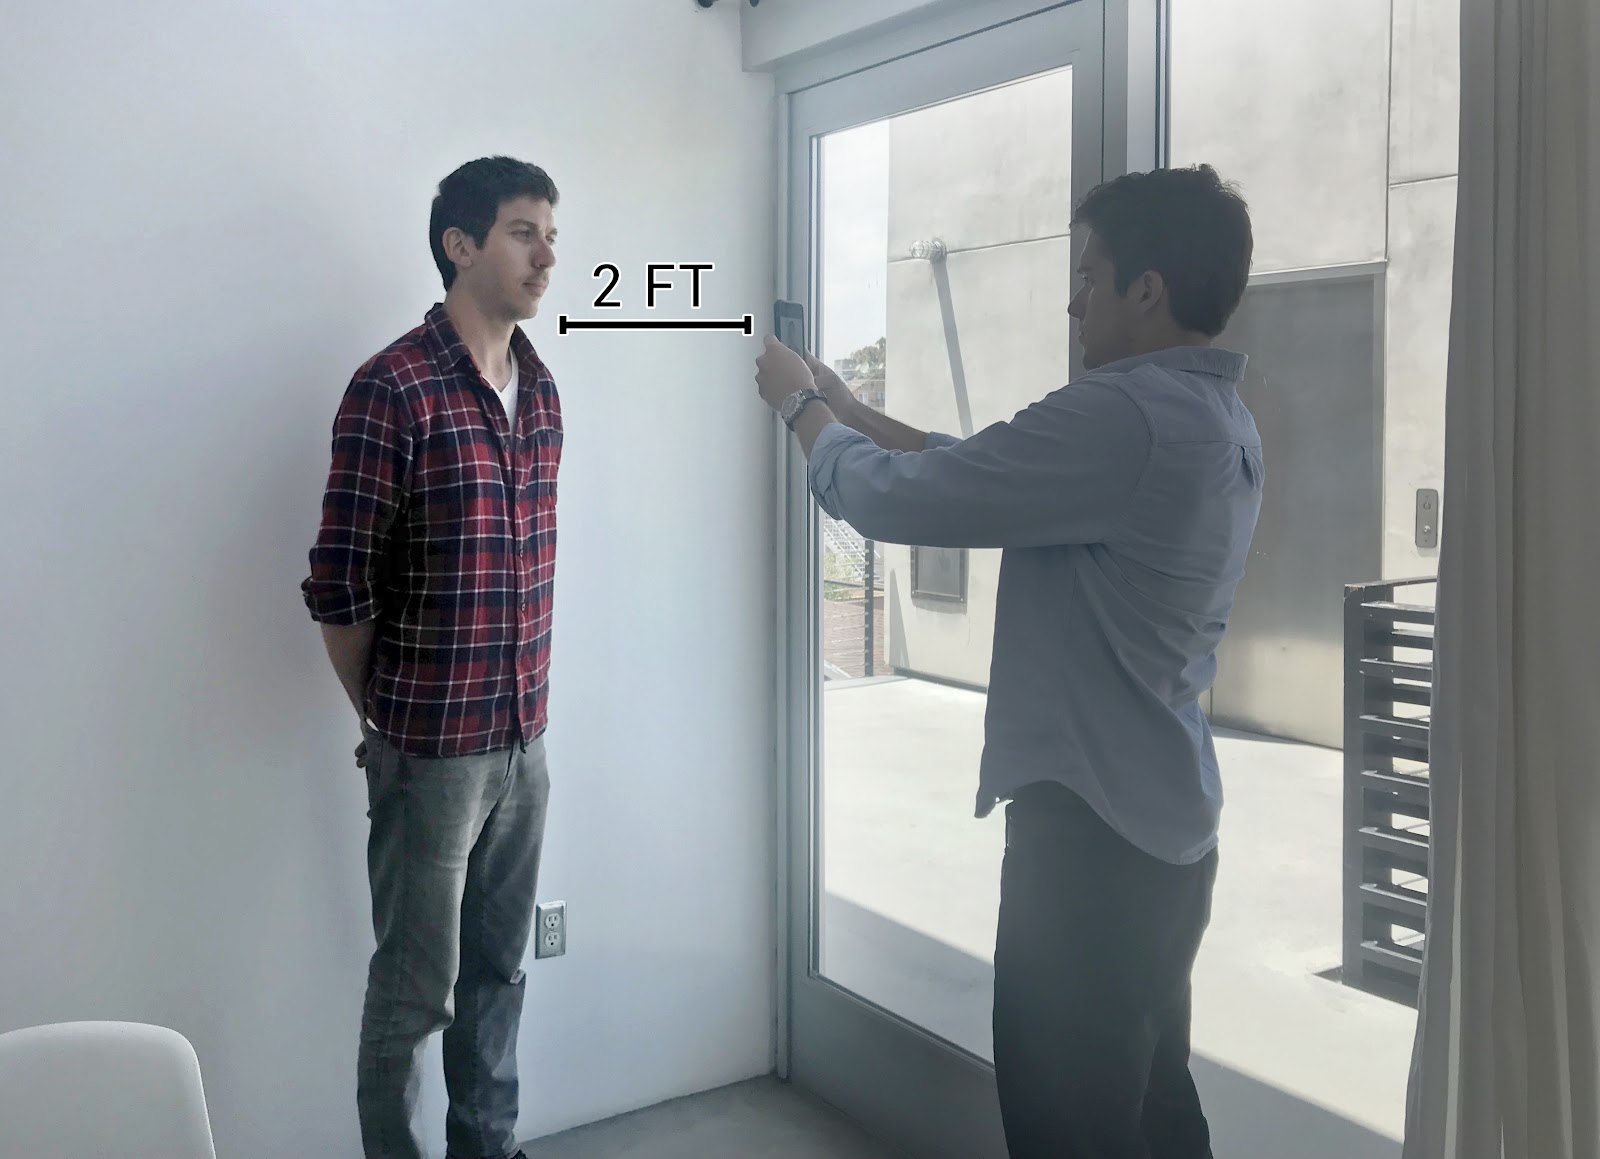

- Find a plain wall next to a large window.
- Position yourself a few inches from the wall. Turn your shoulders slightly towards the window for a more even lighting.
if the light is too harsh, add a diffuser near the window such as thin curtains or a thin bedsheet - The photographer (a friend with a phone works!) should be about 2 feet from you.
They should hold the phone at neck height. - The bottom of the frame should be your chest.
The top should be slightly above your head.
How to take the full body picture
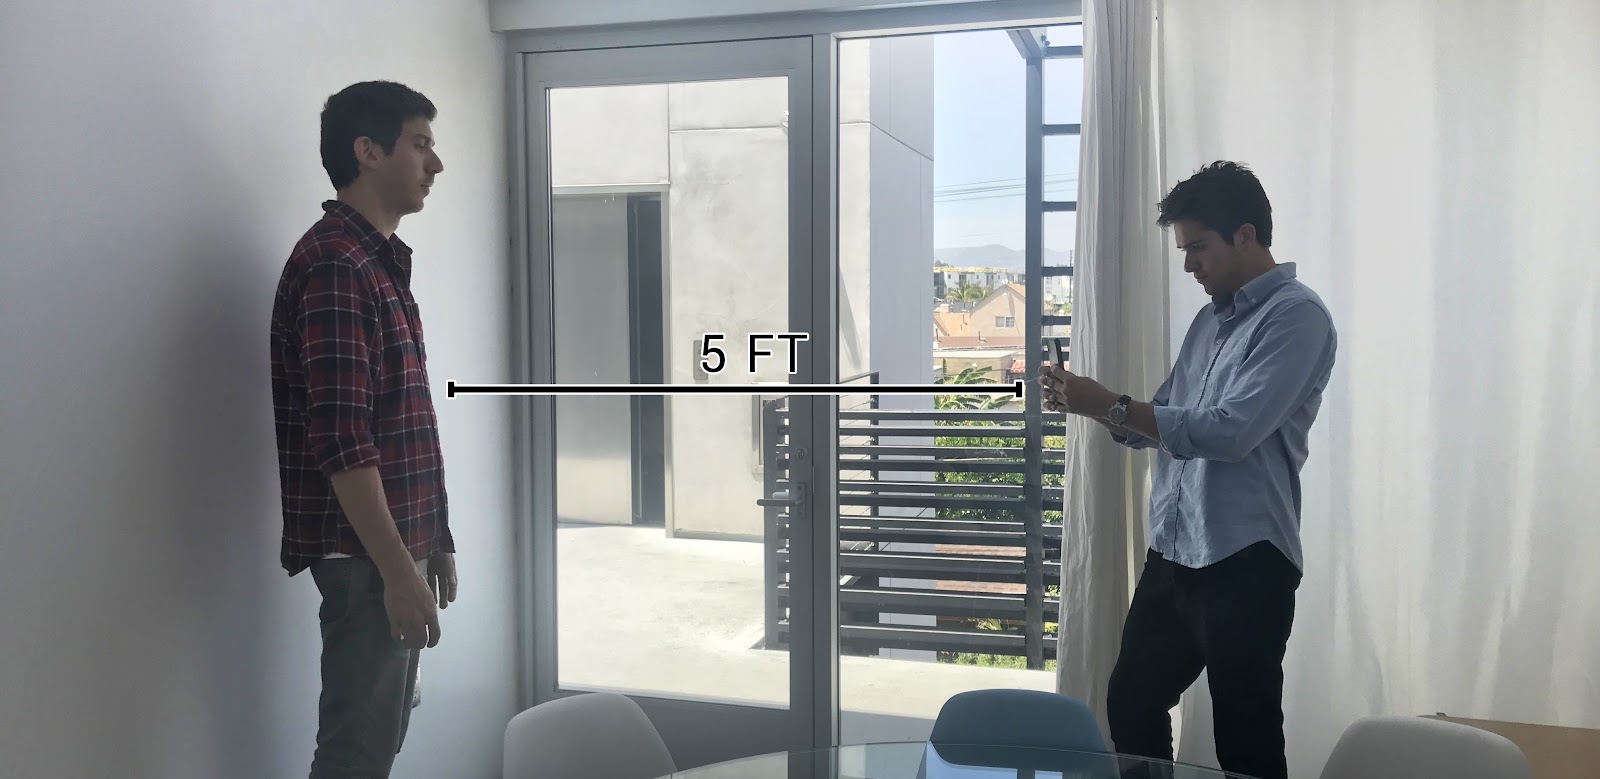
- Have the photographer take a few steps back. We found that standing 5 feet away from the subject worked well.
- Hold the phone at waist or chest height.
Frame the picture from the ankles to the top of the subject’s head.
Measurements Guide
First, you will need to acquire measuring tape. You can purchase some online (Amazon) or at your local store, such as CVS Pharmacy.
It is possible to take your measurements without this tool, but it's more difficult. See these instructions for that.
Males
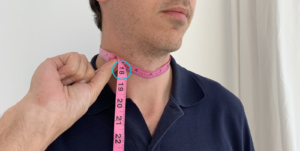
Neck
This measurement is taken around the neck with the measuring tape resting on your shoulders. Put one finger between the tape and skin if you would like some extra space in your fitting.
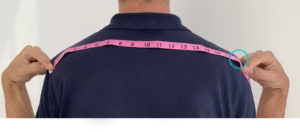
Shoulder to Shoulder
The shoulder width is measured from armpit to armpit. However, you should pull the middle part of the tape a little bit above your initial recording spot up to your shoulder height creating a slight arc with the tape.
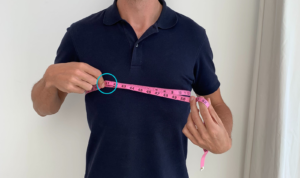
Chest
The chest measurement is recorded at the widest point. Do not stiff up, instead, stand in a relaxed manner and breathe out.
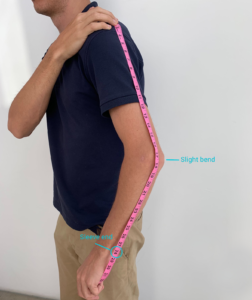
Sleeve
The sleeve length is recorded from where you recorded the shoulder width down to where you want your sleeve to end. Even more, while recording this measurement, slightly bend your arm.
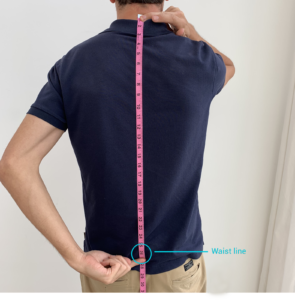
Nape to Waist
Nape to waist is measured by recording from the top of your back and the center of your neck down to where it meets your waist.

Hips
The hip measurement is taken as a circumference measurement around your hips at the widest part.
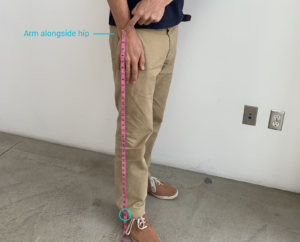
Outseam
Measure your outseam by measuring from the top of your wrist band to the desired length down the side of your leg.
Females
Neck
This measurement is taken around the neck with the measuring tape resting on your shoulders. Put one finger between the tape and skin if you would like some extra space in your fitting.
Shoulder to Shoulder
Stand upright with good posture and relaxed shoulders. Draw tape across your back and over the outer edge of the other shoulder
Chest (Bust)
Measure the circumference around the fullest part of your bust.
Sleeve
Measure your waist where the body ends. If you are unsure of this location, it is easier to find by bending from side to side and noticing where it bends.
Waist
First you need to measure your band size by taking the measurement around your chest, under the arm, and around your back.. Next, measure bust size by taking a loose measurement over the fullest part of your bust. Calculate your cup size with a bra size calculator.
Stand up straight and separate your feet. Hold the tape at the highest point of your crotch and bring the tape down the inside of your leg all the way to the base of your ankle bone.
Measure your outseam by measuring from the top of your wrist band to the desired length down the side of your leg.
Hip
Nape to Waist
Measure the circumference around the fullest part of your hip
Inseam
Measure from the center back of your neck to the center of your waistline
Cup
Outseam
Begin measuring from the top of the arm (the key point is the bone at the shoulder top) down to the wrist bone. KEY: bend your elbow to ensure movement
Accessories
Shoes
With your socks on, trace the base of your foot on a piece of paper or other material. You can then use the measuring tape to measure the length and width of your shoe.
Hat
To measure hat size, place the measuring tape around your head. Try to place it around an eight (⅛) of an inch above your ears. If your measurement happens to fall between two sizes, choose the largest one.
Size | S | M | L | XL | XXL |
Head Size | 6 ⅞ - 7 | 7 ⅛ - 7 ¼ | 7 ⅜ - 7 ½ | 7 ⅝ - 7 ¾ | 7 ⅞ - 8 |
In. | 22 ⅛ - 22 ½ | 22 ⅞ - 23 ¼ | 23 ⅜ - 24 | 24 ⅜ - 24 ¾ | 25 ½ + |
Glove
Measure the circumference around the palm of your hand. If your measurement happens to fall between two sizes, choose the largest one.
Men’s
XS | S | M | L | XL | XXL |
7 in. | 7 ½ - 8 in. | 8 ½ - 9 in. | 9 ½ - 10 in. | 10 ½ - 11 in. | 11 ½ - 12 in. |
18 cm | 20 cm | 23 cm | 25 cm | 28 cm | 30 cm |
Women”s
XS | S | M | L | XL |
6 in. | 6.5 in. | 7 in. | 7.5 in. | 8in. |
Ring
First, you can print some printable ring sizers. Cut a piece of string or paper and wrap it around your finger at the base of the knuckle. Mark where the the ends overlap and lay it flat to later on measure in mm. If your measurement happens to fall between two sizes, choose the largest one.
Size: 6 | 7 | 8 | 9 | 10 | 11 |
52mm | 55mm | 57mm | 59mm | 62mm | 65mm |
